Replacing the surface is an opportunity to fix the detail that caused the problem. Record the condition and retained structure before ordering boards.
Next decision: Check actual dimensions, support, fastening, transitions and repair access against the replacement product.
Keep in mind: The old footprint does not prove that a new material can use the old assembly unchanged.
A clear sequence for replacement planning
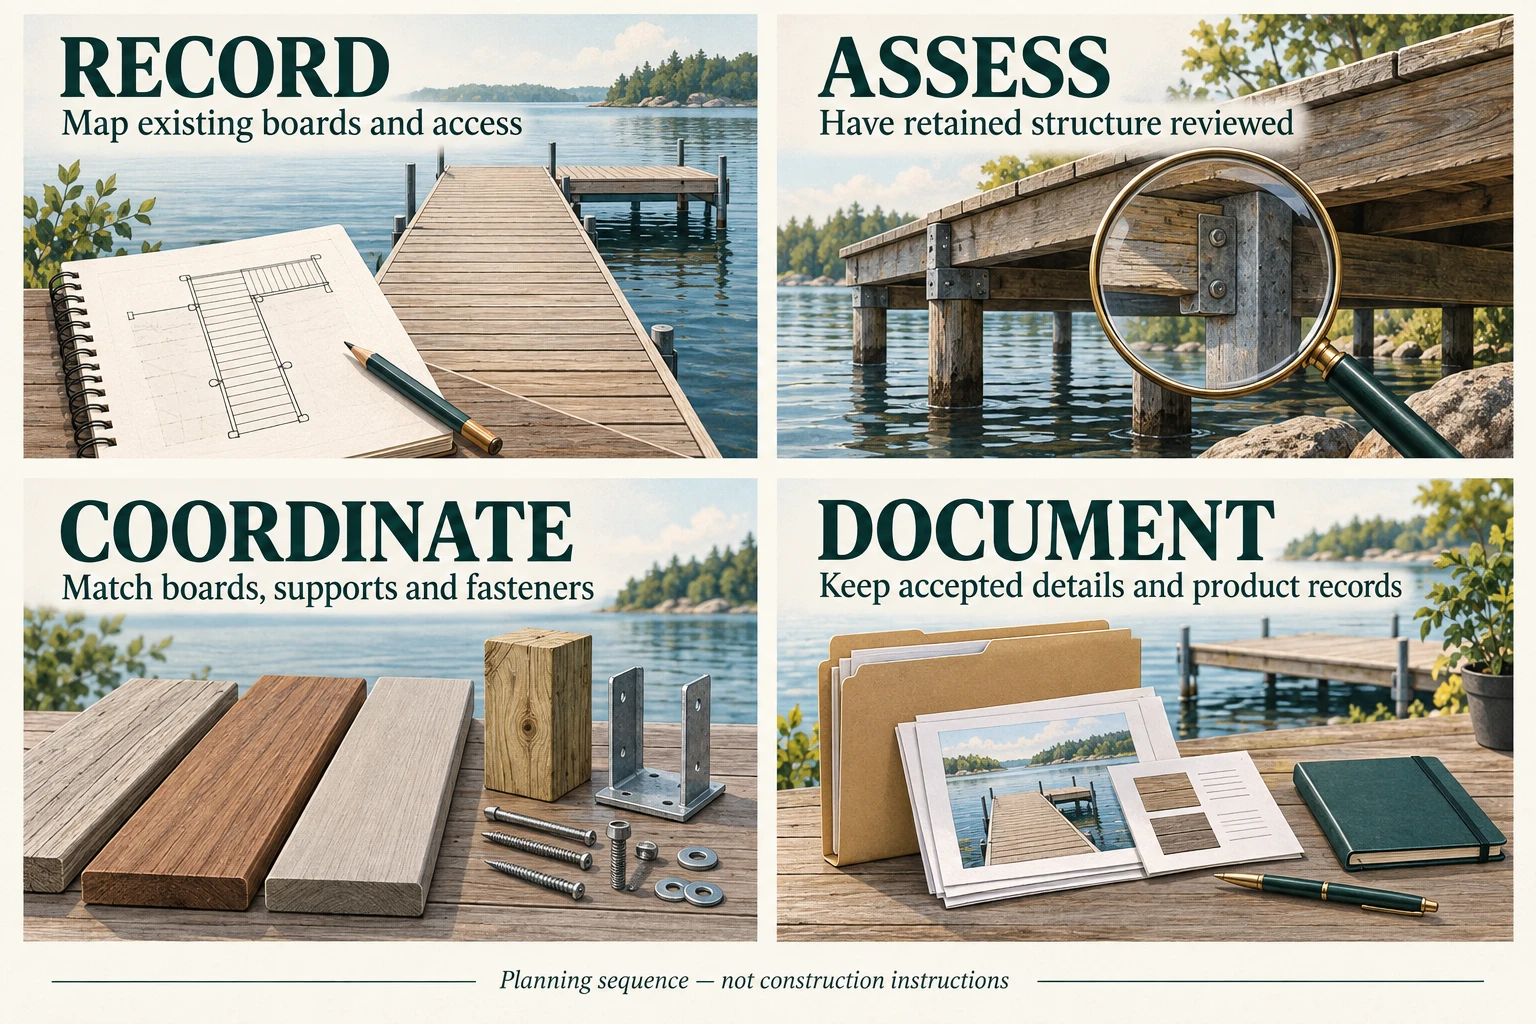
Read the infographic as text
- Record: map the existing boards, interfaces and access points.
- Assess: have the retained structure reviewed before assuming it is suitable for new decking.
- Coordinate: match the selected boards, support arrangement and fasteners through accepted details.
- Document: keep product records, accepted details and changes for future maintenance.
Define what is being replaced
Separate a surface replacement from changes to framing, flotation, rails, utilities and connections. Record which parts are intended to remain, which are already known to need work and which cannot be evaluated until boards are removed. An apparently simple board replacement can expose inaccessible defects; include a decision point for that discovery instead of treating the existing structure as approved.
Use a marked plan and photographs to identify each area. Record board direction, border details, access hatches and the transitions to shore or adjacent platforms. Measure the actual board width and thickness, not just the name used on an old invoice. Also record the support arrangement and how the boards are attached. The selected replacement needs to work with those interfaces, not merely cover the same square footage.
Investigate the reason for replacement
Ask whether the complaint concerns appearance, loose fixings, damaged boards, trapped debris, access, movement or a broader structural concern. Map symptoms to locations. A recurring problem beside a border or at an end joint may deserve a detail review rather than an identical replacement. Record what is visible without assuming a cause from a photograph.
If movement, instability, loose components or uncertain structural condition are present, arrange qualified assessment and restrict access as appropriate. A materials calculator cannot determine whether the dock is safe. Do not remove boards on the assumption that they have no structural role; some proprietary systems have removable panels, but that does not establish the role of decking in another assembly.
Review the new material against the retained assembly
Compare actual thickness, attachment method, end support, finish height and weight information with the proposed product. A different thickness can change transitions and fastener selection. A different fastening system can require a compatible groove or revised support details. On a floating structure, the designer needs the proposed material information to review dead load and the floating system.
Obtain the installation documentation for the exact replacement product. Do not transfer support spacing or screw details from the removed boards to the new surface by default. Record accepted details in a replacement schedule, including end joints, edges, access panels and any places that depart from a typical run. This makes supplier alternatives easier to evaluate.
Organize removal and installation
Plan the sequence with the contractor so access, work areas and temporary conditions are addressed. Include containment and removal of old screws, offcuts and demolition debris near the water. Clarify who handles existing utilities and how owners or marina users will be kept away from active work. Disposal and environmental requirements depend on location and material condition.
Before ordering, reconcile measured zones with stock-length options, board direction and the accepted cut plan. Keep framing, hardware, fascia, rails and demolition quantities separate from decking linear feet. That separation avoids a deceptively complete total that covers boards but omits the work needed to install them.
Create a record for the next maintenance cycle
Keep dated photographs before removal, of exposed supports, and of completed details. Save the selected product references, fastener schedule and any approved substitutions. Record the areas replaced and areas retained so a future inspector can distinguish the new work from older components.
At handover, ask for a maintenance and inspection plan matched to the installed assembly. Include how to reach concealed areas and how a single board or panel can be removed. A replacement is most useful when it resolves the original problem and leaves a better record for the next person responsible for the dock.
A replacement decision log
Use a simple log with five columns: location, observed condition, proposed action, responsible reviewer and status. For example, “outer platform / raised screw heads / review fastening and board condition / contractor / open” is a recorded issue. “Replace all screws with longer ones” is an unreviewed solution unless the connection has been assessed. Keeping the observation separate from the remedy prevents a guess from becoming a purchasing instruction.
Mark hold points before removal, after the supporting structure becomes visible and before the new surface is closed. At each hold point, identify who decides whether work can proceed. A materials-only supplier may help identify boards and hardware, while the contractor or designer addresses the assembly. Clear responsibility is particularly valuable when concealed conditions can change the scope.
Maintain two quantity lists while uncertainty remains: the measured decking surface and the additional work still to be assessed. The first can support a preliminary material inquiry. The second explains why the preliminary figure is not a complete renovation price. When the exposed structure has been reviewed, update the same layout and schedule rather than starting a separate, inconsistent set of measurements.
Can replacement boards follow the old layout exactly?
Only after the retained layout has been checked against the new product and accepted details. A different actual width changes row count. A different attachment system may affect the edge profile or support detail. A different thickness may change the transition at an adjoining surface. These are reasons to review the layout, even when the footprint stays the same.
Treat the old layout as useful evidence of what exists, not automatic approval of the new work. Photograph and measure it before removal, then distinguish details accepted for reuse from those that must change. The final material schedule should follow that reviewed decision.
Replacement sequence with decision points
- RecordMap observed conditions and retained parts.
- Expose safelyFollow the accepted removal sequence; assess concealed conditions.
- ResolveAccept repairs and revised support / hardware details.
- Close & documentInstall the accepted surface and retain the final records.
General wood science. Does not establish a spacing schedule, structural span, or performance guarantee for a supplied decking product.
Research on moisture and corrosion of metals embedded in wood. Not a saltwater alloy approval or a product-specific connection schedule.